For this project, I wanted to put GPT-6 Astra to work on something concrete: take the files from a Realsee scan, have Astra run Blender, and turn the real space into a 3D model I could keep editing.
If you already capture spaces with Realsee, this opens up an interesting workflow. Beyond viewing the VR tour online, you can download additional outputs—models, point clouds, panoramas, and CAD files—and give them to AI as modeling references. The resulting space can become a place to try a new layout, change wall and floor materials, or make a walkthrough.
I tried this with a project containing a corridor, a photography room, a bar, a game room, and a living/dining area. Here is how to prepare the inputs, get Astra working with Blender, and refine the first model.
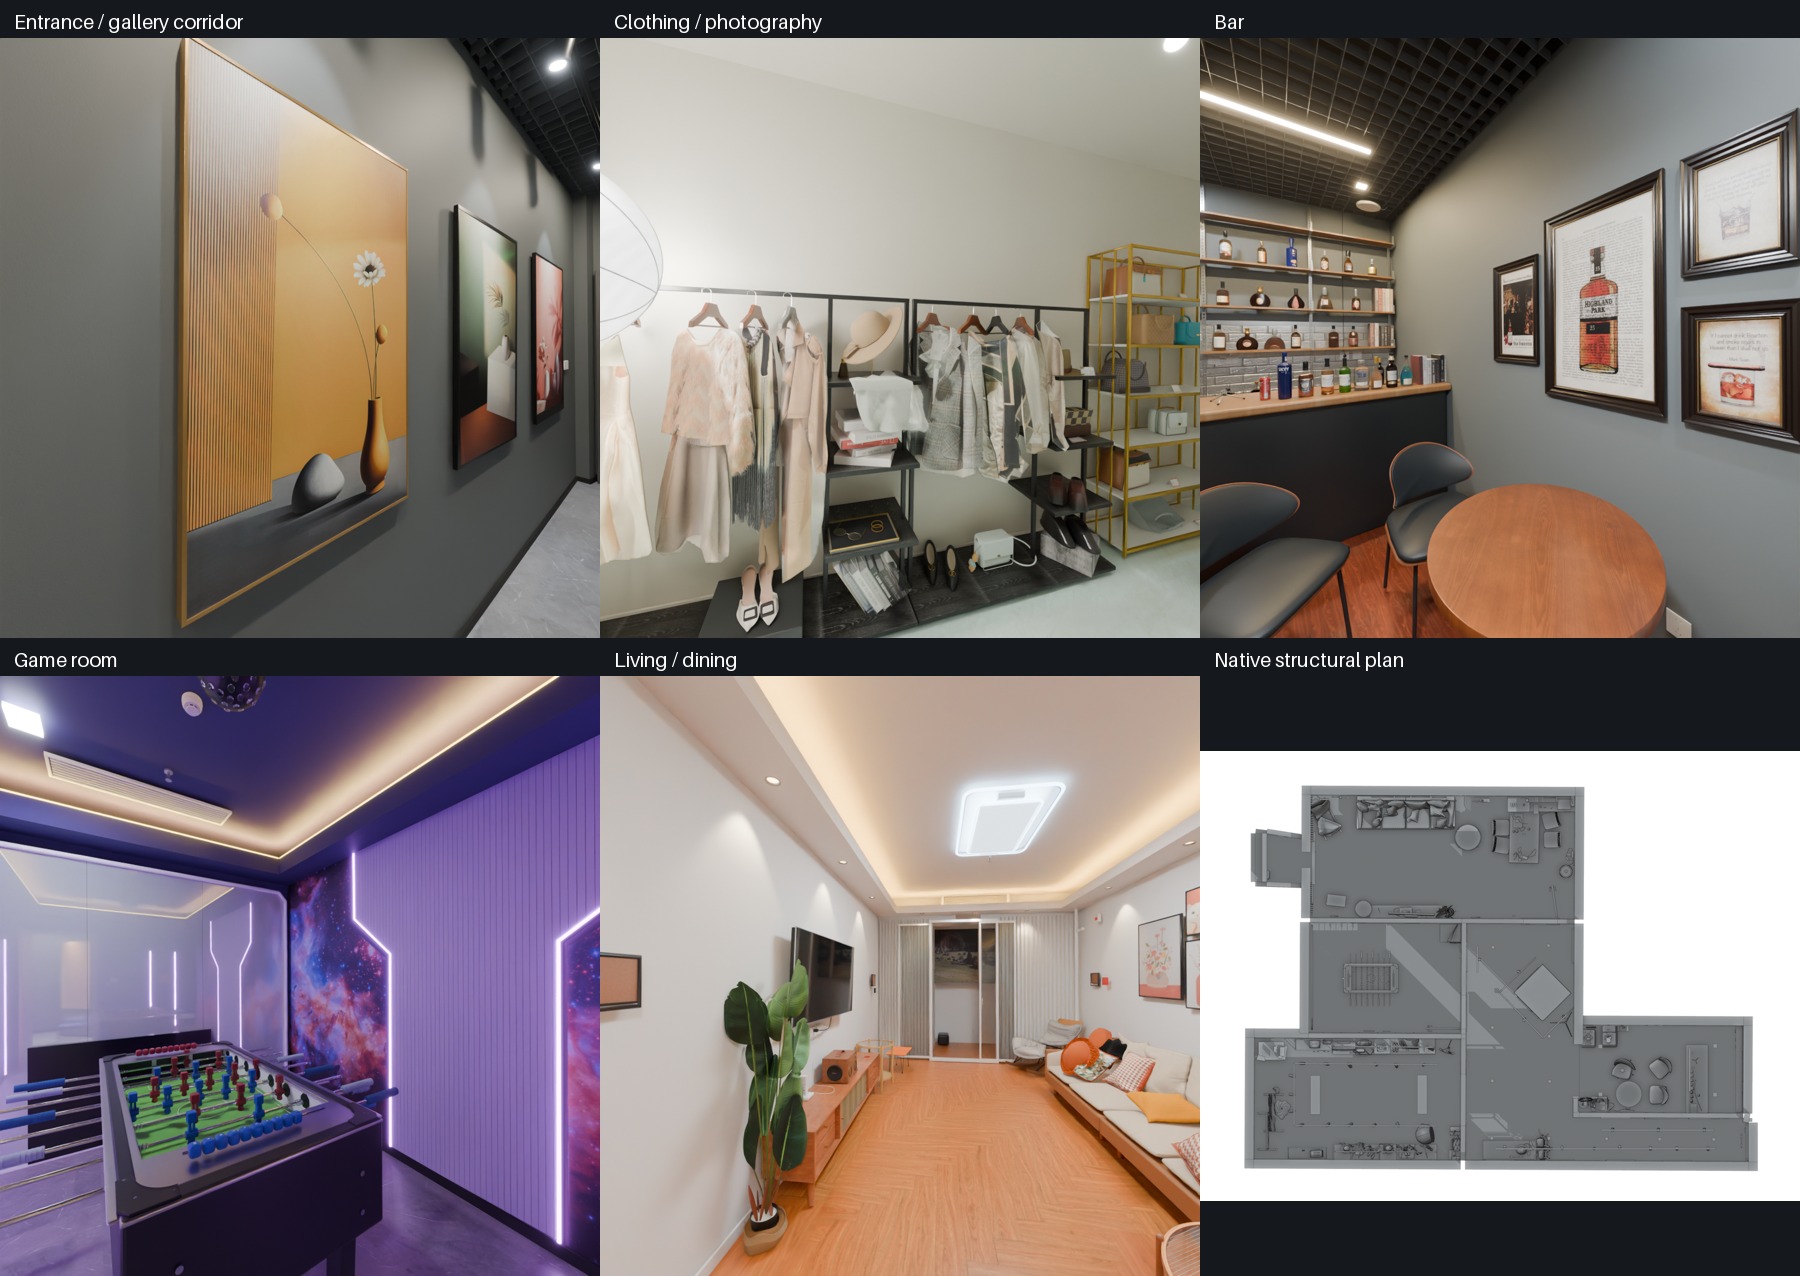
The Blender reconstruction, with the original scan reference hidden.
To see the original space, open the official Realsee online tour. You can explore it without downloading any models or scan data and compare it with the Blender results in this article.
1. Prepare the Realsee inputs
You can follow along with this case or model a space you have captured yourself.
Use this case. The original case inputs are available through Git LFS: 396 files, about 5.66 GiB, including models, textures, point clouds, panoramas, and CAD. Install Git LFS, then download the source data:
GIT_LFS_SKIP_SMUDGE=1 git clone https://github.com/realsee-developer/realsee-astra-blender.git
cd realsee-astra-blender
git lfs install --local
git lfs pull --include='data/**' --exclude=''
The files will be in data/, ready for step 2. If you already cloned the repository, run the last two commands from its root. The data guide also explains how to download a smaller starting set. Fetch the actual LFS files before modeling; the small text pointers in a source checkout are not usable inputs.
Use your own space. Download its additional outputs from Realsee:
Open your VR project in the Realsee workspace. Choose Add-ons, select Model and the formats you need, then submit the task and download the result. See the official model download guide.
Start with these types of files:
| What to download | How Astra can use it |
|---|---|
| 3D models and textures, such as OBJ or GLB | Understand the overall shape and keep a modeling reference |
| Point clouds, such as PLY or E57 | Locate walls, floors, and ceilings and understand the space's proportions |
| Panoramas | Inspect the appearance, materials, lighting, and connections between areas |
| CAD or floor plans | Understand the layout, wall lines, and door and window locations |
Point clouds and CAD have their own download options; see Realsee's point cloud guide and CAD guide. If you also have RAW images, cube-map faces, or video, add those to the input folder for Astra to consult when useful.
Each source contributes something different. The model shows the whole space, photographs supply its appearance, and point clouds and drawings help place the structure accurately. Organize what you have first, then let Astra inspect it and explain what else would help.
Keep the complete downloaded folders, especially the textures beside the model files. In this project, I encountered a GLB that referenced external textures; moving the model alone would have lost them. If you have several formats of the same model, keep them together and let Astra identify the duplicates.
2. Set up Blender and give Astra access to the project
I used GPT-6 Astra in Codex alongside Blender installed on my computer. Astra can read project files, write and run scripts, and use Blender's Python interface, bpy, to create scenes, edit models, and render views.
That is what “having Astra run Blender” means here: it turns your request into modeling operations and executes them in your local Blender installation. You describe the task in ordinary language, open the project to see the result, and ask for changes along the way.
Install Blender and open the cloned repository in Codex. If you are using your own space, create a separate project folder and put its downloaded files in data/, keeping the provided case inputs intact. The initial layout can be this simple:
my-space-project/
└── data/
    └── Realsee exports, with their original folder structure
Start with a short request to confirm Astra can find the inputs and Blender:
This is a Realsee space reconstruction project. All source files are in data/.
Inspect the available files, find the Blender executable installed on this computer,
and check that you can run it. Briefly explain what each source can be used for
and what is missing.
Once that works, move on to modeling. Astra can create the scripts, previews, and output directories as it goes.
3. Be clear about the editable space you want
Describe the kind of Blender project you want to receive. For example, you should be able to select walls, floors, ceilings, doors, and windows separately, change their materials independently, and keep the original scan available for comparison.
You can use this prompt as a starting point:
Use the Realsee exports in data/ and run Blender locally to reconstruct this space.
Save the result as output/reconstruction_native.blend.

Focus on the space first: room layout, walls, floors, ceilings, doors, windows,
and the connections between areas. Use the scan model, point clouds, CAD,
and panoramas together to understand the site and preserve its proportions.

Walls, floors, ceilings, door frames, and door leaves should have their own
editable native models and materials. Keep the original scan as a reference
that can be hidden. Add furniture and small objects after the main space is built.

First show me a model and a few previews that make the layout easy to understand.
Then refine materials and lighting against the source. Save the project after
each stage and briefly explain what you completed.

Actually perform the modeling. Finally, reopen the saved .blend file and confirm
that the models and textures load correctly and remain editable.
This gives you a few stages you can easily review: build the space, check the layout, then refine its appearance. You do not need to specify how to construct every wall or align every camera at the start. Let Astra work out those operations from the inputs.
4. Use previews to keep the conversation going
When the first version is ready, look at the whole space. Are any rooms missing? Does the corridor connect them correctly? Are the doors and windows in the right places? Does the ceiling resemble the original? At this stage, a plan view can be more useful than a polished interior render.
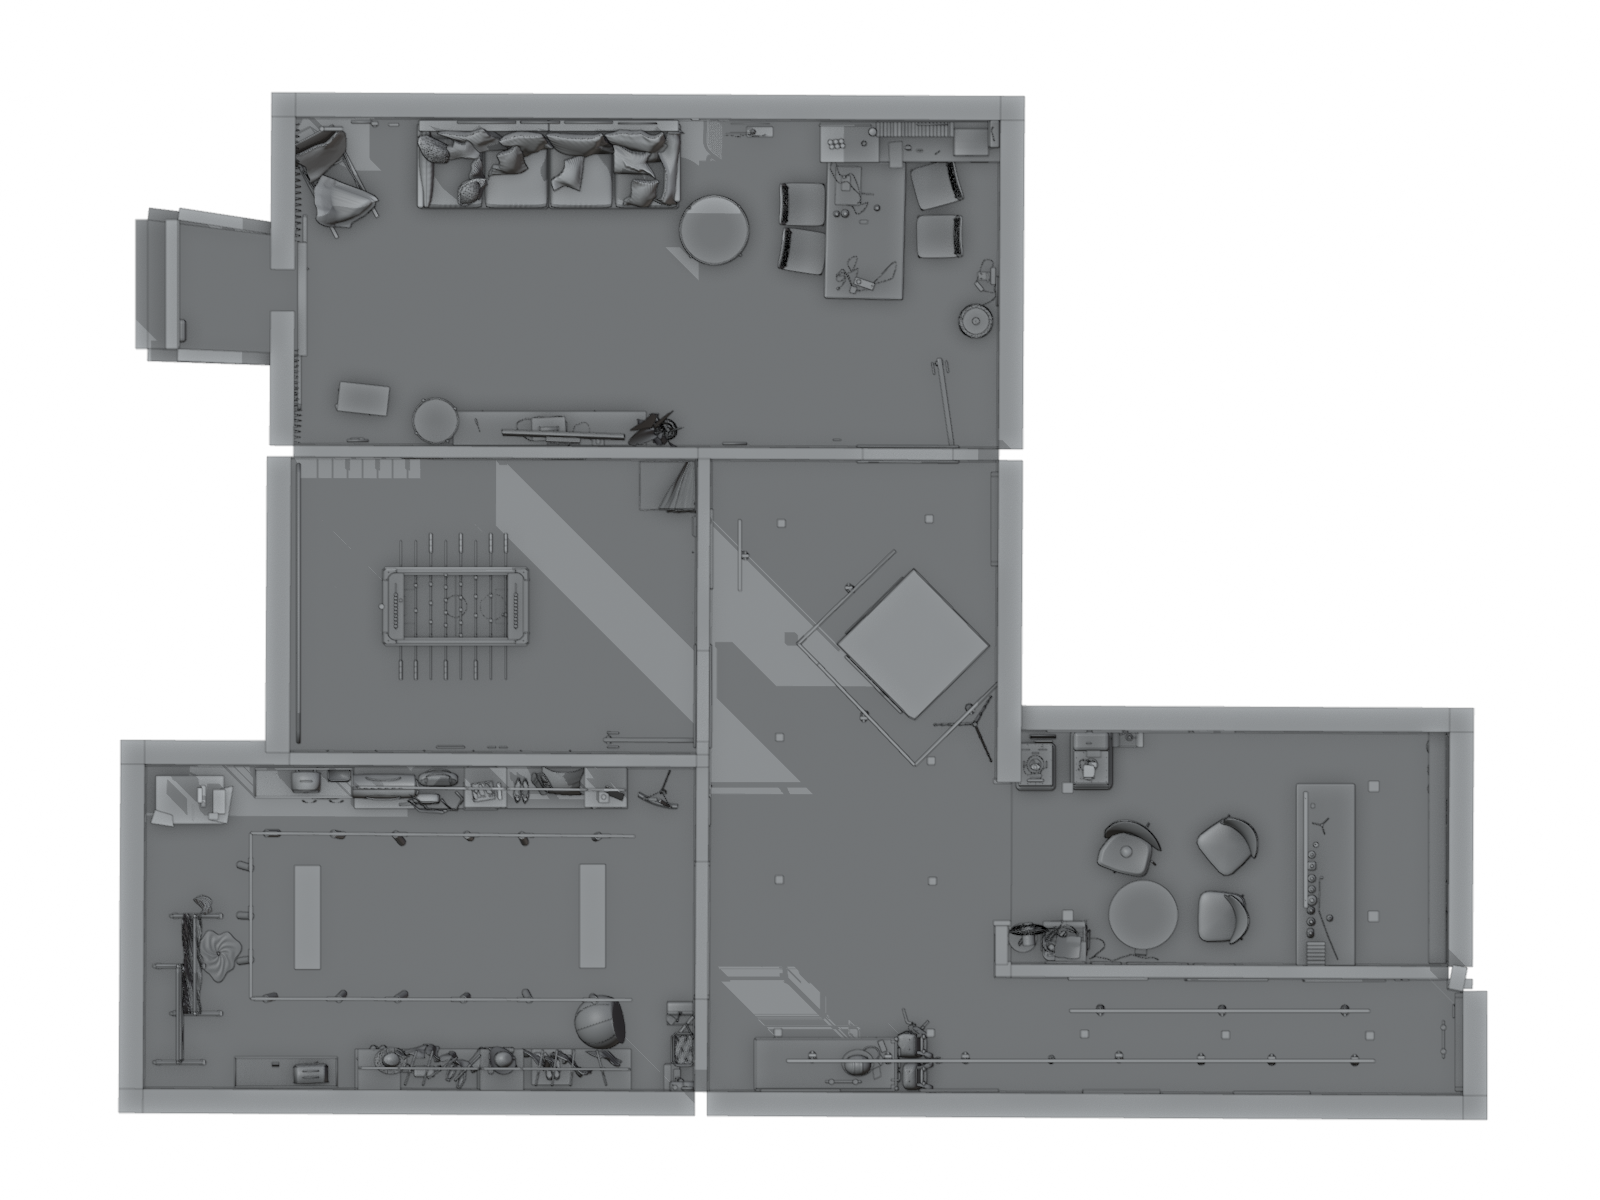
The layout with ceilings hidden, making the relationship between rooms and corridors easier to see. Furniture has already been added in this view.
When something looks wrong, name the area and describe the difference. For example:
Hide the furniture and show me a plan view of the entire space.
Focus on the connections between the rooms and the corridor.
Or:
Check the opening from the photography room into the corridor against the
original panorama again. Fix the walls, opening, and ceiling first,
then work on the decorative details.
Once the space is in good shape, turn to materials and lighting:
Use the panoramas to adjust the wall, floor, and ceiling materials and add
the main lights. Put the source photos beside renders from matching viewpoints
so I can compare them.
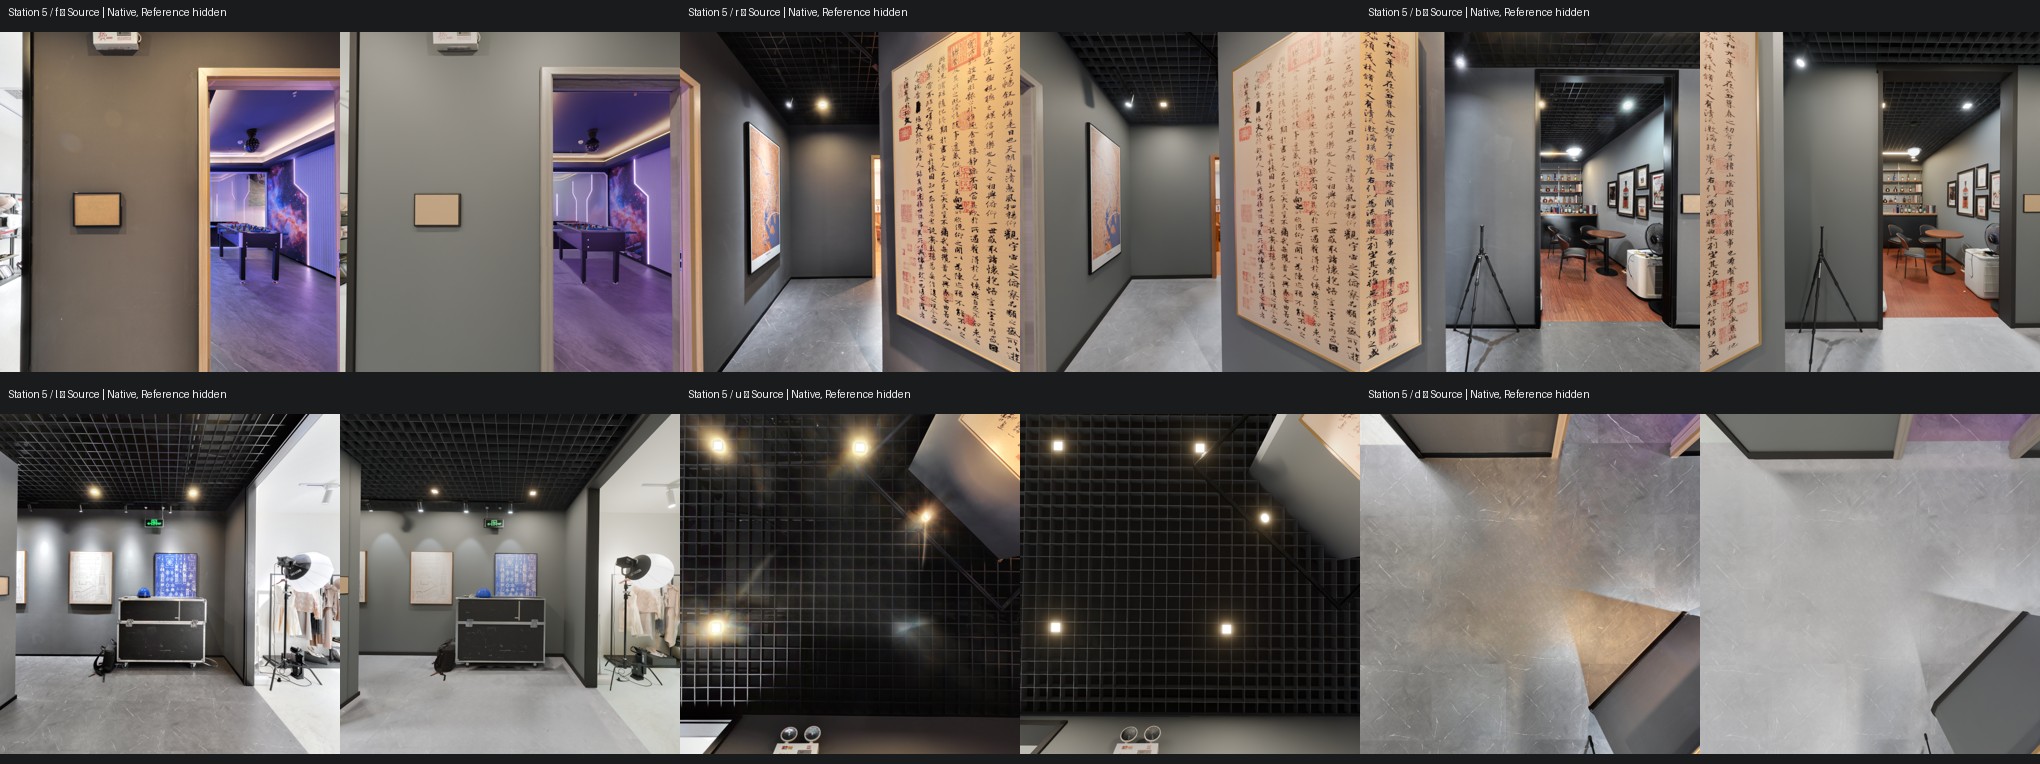
Each pair shows the source photo on the left and the Blender render on the right. Side-by-side views make the remaining differences easier to spot.
This is what I find most useful about the workflow: you can keep discussing the space you see. “The corridor is too bright.” “That opening has the wrong shape.” “Keep the layout and try a different wall finish.” Astra makes the changes in Blender, and you judge whether the result is what you want.
Leave furniture and small objects until later. Getting the space into shape first makes it easier to decide which details deserve more work.
5. Open the project and try something new with the space
Open the .blend file in Blender. Select a wall section, door frame, or floor on its own. Change a material, hide the ceiling, and look around. These simple edits quickly show whether the model is convenient to work with.
You can also ask Astra to keep going:
Make a copy of the current project, try new wall and floor colors,
and show me a few comparison views.
Create a walkthrough starting at the entrance and passing through the main areas.
Keep the camera route in the Blender project so I can adjust it later.
This project produced an editable native scene and an 85-second walkthrough video. The original scan inputs became a Blender scene that could be edited, rendered, and presented. Code, previews, models, and video are available; see the case files page for download instructions.
Start with the provided case inputs or the additional outputs from your own Realsee project, and ask Astra to build the first version of the space. Open it, take a look, and tell it what you want to change next.
Want to share your space model or compare notes? Join our Discord and show us what you are building.